Guide: 4Media iPod to PC Transfer
Here we would like to tell you how to transfer muisc from iPod to computer and iTunes, transfer songs from iPod to iPod, and import files from computer to iPod with 4Media iPod to PC Transfer.
First, install and run the software, all information about your iPod, such as type, capacity, version, serial number, and format, will be shown on the main interface.
Tip: All functions for iPod are applicable to iPhone as well except for the photo management.
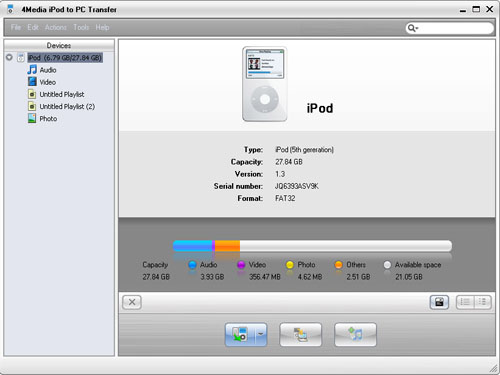
Choose what you want to do from the following processes:
Import files to iPod
Export checked files to local
Export checked files to iTunes library
Transfer files among several iPods
Edit iPod playlist
Show you more usage skills
Import files to iPod
1. Open the library/playlist that you want to import.
2. Click the "Add files to iPod" button, choose the "Add Files to List" option, then locate the files to your iPod.
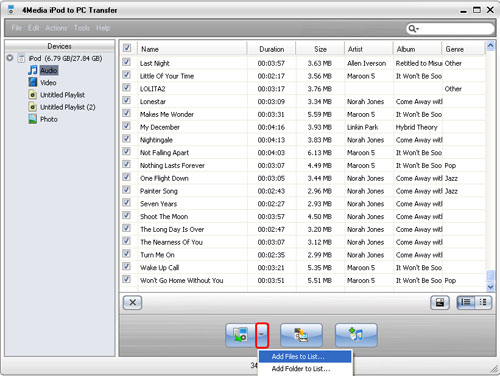
Tip: If you want to import a folder, please click the "Add files to iPod" drop-down button, and choose the "Add Folder to List" option.
3. Locate the required files to import to your iPod.
Export checked files to local
1. Open the library/playlist that you want to export.
2. Check the file(s) you want to export in the file list.
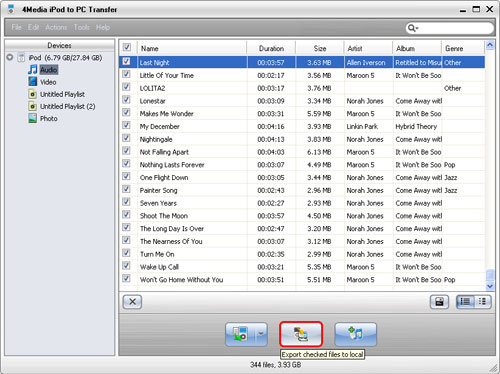
3. Click the "Export checked files to local" button to start exporting files, or choose the "Export to local" option from the "Action" menu, and then export the files from your iPod to local.
Export checked files to iTunes library
1. Open the library/playlist that you want to export.
2. Check the file(s) you want to export in the file list.
3. Click the "iPod to iTunes" button to start exporting files.
Transfer files among several iPods
Here i will take the transferring between two iPods for example.
1. Connect the two iPods via USB cable. Both iPods will be detected immediately, and all the contents of iPods are displayed in the left device list as below.
BTW, this iPod transfer supports up to 26 iPods and one iPhone/iPod touch at the same time. Transferring files between iPod and iPhone/iPod touch works well too.
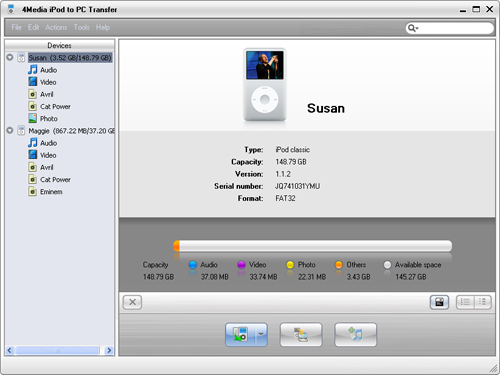
2. In the left device list, locate the source library or playlist of one iPod from which you want to transfer files to the other iPod. And then highlight the wanted files in the right file list.
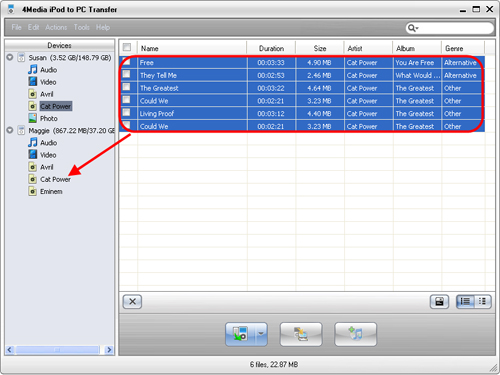
3. Drag and drop the selected files onto the icon of the target library or playlist in the left device list.
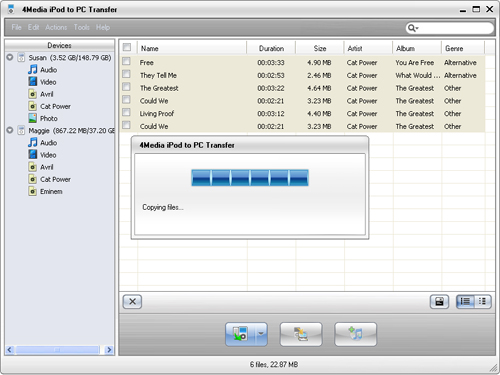
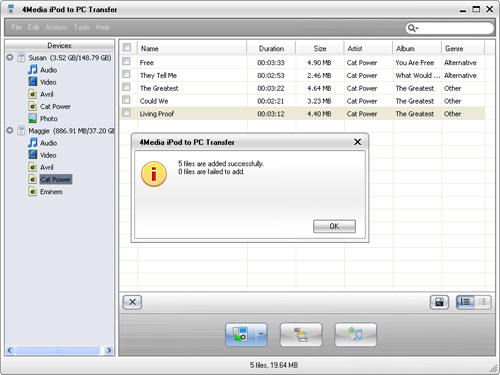
4. Now, the files are successfully copied from one iPod to the other.
Edit iPod playlist
1. Create a new playlist.
2. Choose the "File -> Playlist" option, and then choose the "New Playlist" option from the submenu. After done, you can right-click the new playlist to rename it.
3. Drag & drop to import or export files.
Select the file you need and drag it to the local, or select the file from the local and drag it to the iPod.
More usage skills
Locate the file quickly in two ways
Click the "Quickly browse your iPod library" button, and you can find that the files sorted by genre, artist, and album from the pop-up window.
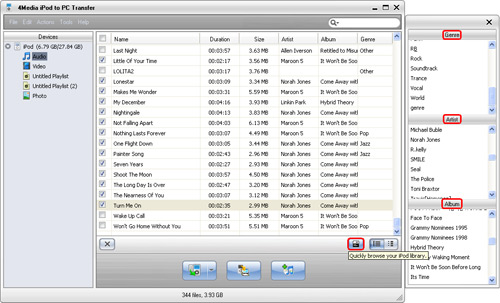
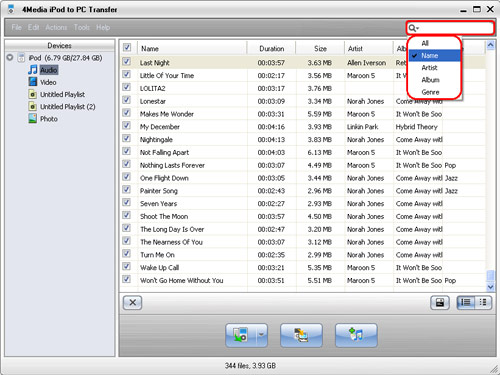
Click the "Quick search of item, artist, and album" button, choose the genus and input what you want to search in the textbox.
View files in two modes
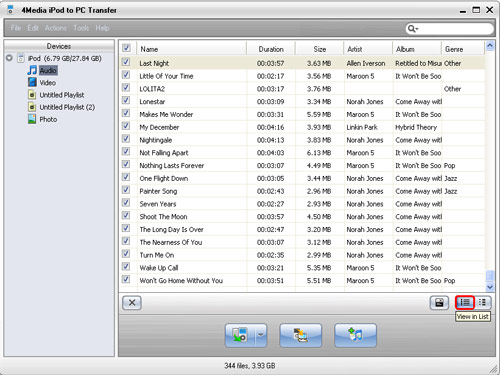
Click the "View in List" button to view files.
Click the "View in Illustration" button to view files.
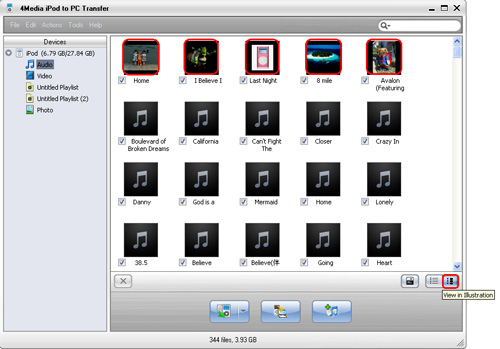
Tip: In the illustration view mode, drag an image from your computer to the song or video listed in the program. The image would be added as the file's cover.
Open iPod with Window Explorer
Click "File -> Open with Window Explorer", and then you can manage your iPod as a portable hard disk.
Featured Guides
Guides Categories
Video/Audio Guides
- 4Media Audio Converter Pro Tutorial
- 4Media Movie Editor 6 Tutorial
- Video Converter Ultimate Tutorial
- How to convert DAT to other videos
DVD/CD/Blu-Ray Guides
- 4Media Blu Ray Converter for Mac Tutorial
- How to convert Blu-ray disc to video files
- How to burn AVI, MPEG, VOB, DAT, M2V, MPG to DVD on Mac
- How to burn DivX to DVD on Mac
iPod Guides
- 4Media iPod Max Guide
- How to convert AVI, MPEG to iPod MP4 format
- Guide: 4Media iPod to PC Transfer
- How to convert DVD to iPod on Mac
iPhone Guides
- 4Media iPhone Contacts Transfer for Mac Tutorial
- 4Media iPhone Contacts Transfer Tutorial
- 4Media iPhone Ringtone Maker for Mac Tutorial
- 4Media iPhone Max Guide
iPad Guides
Youtube/Online Video Guides
- 4Media Online Video Converter for Mac Guide
- 4Media Online Video Downloader for Mac Guide
- 4Media Online Video Converter Guide
- 4Media Online Video Downloader Guide
PPT/PDF Guides
Others
Articles
- How to download YouTube videos for free
- How to download/convert YouTube videos to iPod
- How to download and convert YouTube videos
- All features of apple iPhone
- Now you can get more TV offerings from Apple iTunes
- Video Streamer HAVA from Snappy Multimedia
- iPod Growth Driving Demand for Flash Memory
- MediaMan HVX-3500 Review
- Uncertain whether new iPod will be delayed or not because of hurdles
- T3's top five iPod alternatives
- Envivio Exhibits MPEG-4 Solutions from Mobile to HD at CCBN2006

